Instalar una pérgola de aluminio es una forma sencilla de mejorar su espacio exterior con una estructura elegante y duradera. Estas pérgolas se han convertido en la opción preferida de muchos propietarios, gracias a su buen aspecto, resistencia y montaje relativamente sencillo. Esta guía explica por qué las pérgolas de aluminio son tan prácticas, desde las ventajas de los materiales hasta el proceso de instalación paso a paso, pasando por la preparación, el mantenimiento y las diferencias entre los distintos tipos. Tanto si es un principiante en el bricolaje como si piensa contratar a profesionales, encontrará todo lo que necesita saber para tomar decisiones inteligentes y crear un complemento funcional y atractivo para su jardín.
Por qué las pérgolas de aluminio son la mejor elección para las casas modernas
Las pérgolas de aluminio destacan en el mundo de las estructuras de exterior por las propiedades únicas de sus materiales y su cuidado diseño. El aluminio es un metal ligero pero resistente, por lo que estas pérgolas 30-50% son más ligeras que las versiones tradicionales de madera o acero. Esto significa que son más fáciles de transportar y maniobrar, por lo que la mayoría de los adultos pueden manejar los componentes sin muchos problemas. A pesar de su peso ligero, las pérgolas de aluminio son lo suficientemente resistentes como para soportar grandes luces y cargas pesadas, garantizando una estructura sólida sin complicar la instalación.
Otra gran ventaja del aluminio es su resistencia a la corrosión. Cuando se expone al aire, forma de forma natural una capa protectora de óxido que lo protege de la oxidación, por lo que es ideal para soportar la lluvia, la humedad o incluso el aire salado de la costa. La mayoría de las pérgolas de aluminio también vienen con un acabado de recubrimiento en polvo, que añade protección adicional, prolonga su vida útil y ofrece una gama de colores para combinar con el estilo de su hogar. Gracias a su durabilidad, puede prescindir de los pasos de protección contra la oxidación que requiere el acero, lo que agiliza el proceso de instalación.
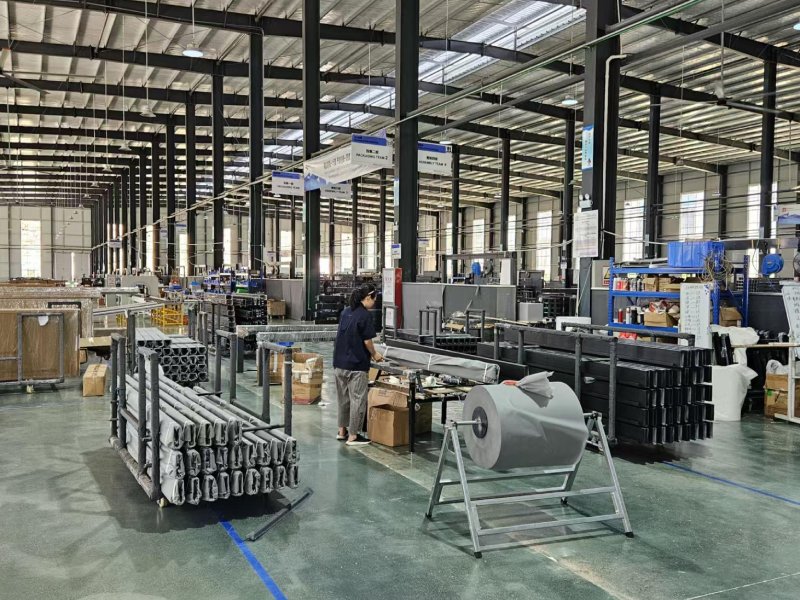
Los diseños modulares y las piezas estandarizadas facilitan la instalación. Muchos fabricantes incluyen componentes premontados, manuales claros e incluso kits de herramientas con elementos esenciales como llaves inglesas, destornilladores y llaves hexagonales, perfectos para los aficionados al bricolaje. El enfoque modular le permite trabajar a su propio ritmo, dividiendo el proyecto en etapas manejables. Esto reduce la barrera de habilidad, por lo que incluso aquellos sin experiencia en la construcción pueden abordarlo.
Los datos muestran que las pérgolas de aluminio se instalan en un 30-40% menos de tiempo que las de madera. Por lo general, dos adultos pueden montar un modelo estándar de 10×10 pies en 6-8 horas, y los diseños más sencillos de techo abierto pueden tardar incluso menos. Esta rapidez significa que podrá disfrutar antes de su espacio exterior mejorado, sin tener que soportar largos periodos de construcción.
Las pérgolas de aluminio también ofrecen flexibilidad de colocación. Su estructura ligera y estable permite instalarla en distintas superficies, como losas de hormigón, patios adoquinados o incluso césped reforzado. No tendrá que reformar su jardín para que funcione, lo que reduce los costes y el esfuerzo. Si alguna vez desea reorganizar su diseño exterior, estas pérgolas son relativamente fáciles de desmontar y trasladar, una ventaja difícil de igualar con otros materiales.
Preparativos: La clave para una instalación sin problemas
El éxito de la instalación de una pérgola depende de una buena preparación. Una buena planificación evita dolores de cabeza durante el montaje y garantiza que su pérgola se mantenga segura y atractiva durante años. Antes de empezar, tendrás que pensar en la selección del emplazamiento, la preparación del terreno, las herramientas y la normativa local.
Elegir el lugar adecuado es el primer paso. Querrá una ubicación que equilibre funcionalidad, belleza y comodidad. Tenga en cuenta el recorrido del sol y los patrones de viento de su jardín para colocar la pérgola de forma que la sombra y la circulación de aire sean óptimas. Dado que las pérgolas suelen ser el centro de las actividades al aire libre, elija un lugar de fácil acceso desde su casa y cerca de otros elementos, como una barbacoa, una piscina o un jardín. Comprueba si hay servicios subterráneos, como cables o tuberías, para evitar daños accidentales. Un truco práctico es marcar la huella de la pérgola con pintura en aerosol o con estacas y cuerda para visualizar cómo encaja en tu espacio.
A continuación, prepare el terreno. Las pérgolas de aluminio son adaptables, pero necesitan una superficie plana y estable. En los cimientos de hormigón, compruebe que no haya grietas ni desniveles. Los patios de adoquines o ladrillo deben tener piedras bien ajustadas para mayor estabilidad. Si se instala sobre césped, es posible que tenga que quitar el césped, compactar la tierra o colocar zapatas de hormigón para los postes. Un drenaje adecuado es crucial: inclinar el suelo o añadir un canal de drenaje evita que el agua se acumule bajo la pérgola, lo que puede perjudicar su longevidad.
No te saltes las normas de construcción locales ni las reglas de la comunidad de propietarios. En muchas zonas, las pérgolas independientes de menos de 2 metros de altura y 215 metros cuadrados no necesitan permisos, pero esto varía. Añadir elementos eléctricos como iluminación o enchufes casi siempre requiere permisos y trabajo profesional. Póngase en contacto con la oficina de construcción local para confirmar los requisitos y tenga a mano las especificaciones del fabricante, ya que puede necesitarlas para las aprobaciones.
Reúna sus herramientas y materiales con antelación. La mayoría de los kits para pérgolas incluyen las herramientas esenciales, pero es probable que necesites elementos básicos como una cinta métrica, un nivel, un taladro eléctrico, un juego de llaves, un mazo de goma y material de seguridad como guantes y gafas. Para las bases de hormigón, ten a mano herramientas para mezclar y una paleta. El día anterior, comprueba todas las piezas y herramientas para asegurarte de que no falta nada ni está dañado, y evitar así retrasos a mitad del proyecto.
Si vas a hacerlo tú mismo, estudia el manual y mira los vídeos de instalación que ofrezca el fabricante. Familiarizarse con los términos y las piezas facilita el proceso. Contar con un ayudante es una decisión inteligente: algunos pasos, como levantar los paneles del tejado, son más seguros y sencillos con dos personas. Por último, prevea un tiempo despejado y tiempo suficiente para completar las etapas clave, como el vertido del hormigón o el montaje de la estructura, para mantener la estructura estable durante el montaje.
Paso a paso: Cómo instalar una pérgola de aluminio
Aunque los detalles de instalación varían según el modelo y la marca, la mayoría de las pérgolas de aluminio siguen una secuencia lógica. Conocer estos pasos le ayudará a prepararse, tanto si lo hace usted mismo como si supervisa a un profesional. Aquí tienes un desglose del proceso estándar con consejos prácticos para cada fase.
Comience con cimentación y diseño. Esto prepara el terreno para una pérgola resistente. Utilice una cinta métrica y marcadores para trazar la posición exacta de la pérgola, incluida la ubicación de los postes. Un nivel es esencial para comprobar la planitud del terreno, ya que incluso las pendientes más pequeñas pueden causar problemas. Si el terreno es irregular, es posible que tengas que rellenar los puntos bajos, rebajar los altos o utilizar bases de postes ajustables. Para las zapatas de hormigón, cava agujeros de unos 30 cm de ancho y 30 cm de profundidad, añade una base de grava para el drenaje y vierte el hormigón. Antes de que fragüe (24-48 horas), empotra las bases de los postes o los pernos de anclaje, asegurándote de que estén a plomo y alineados.
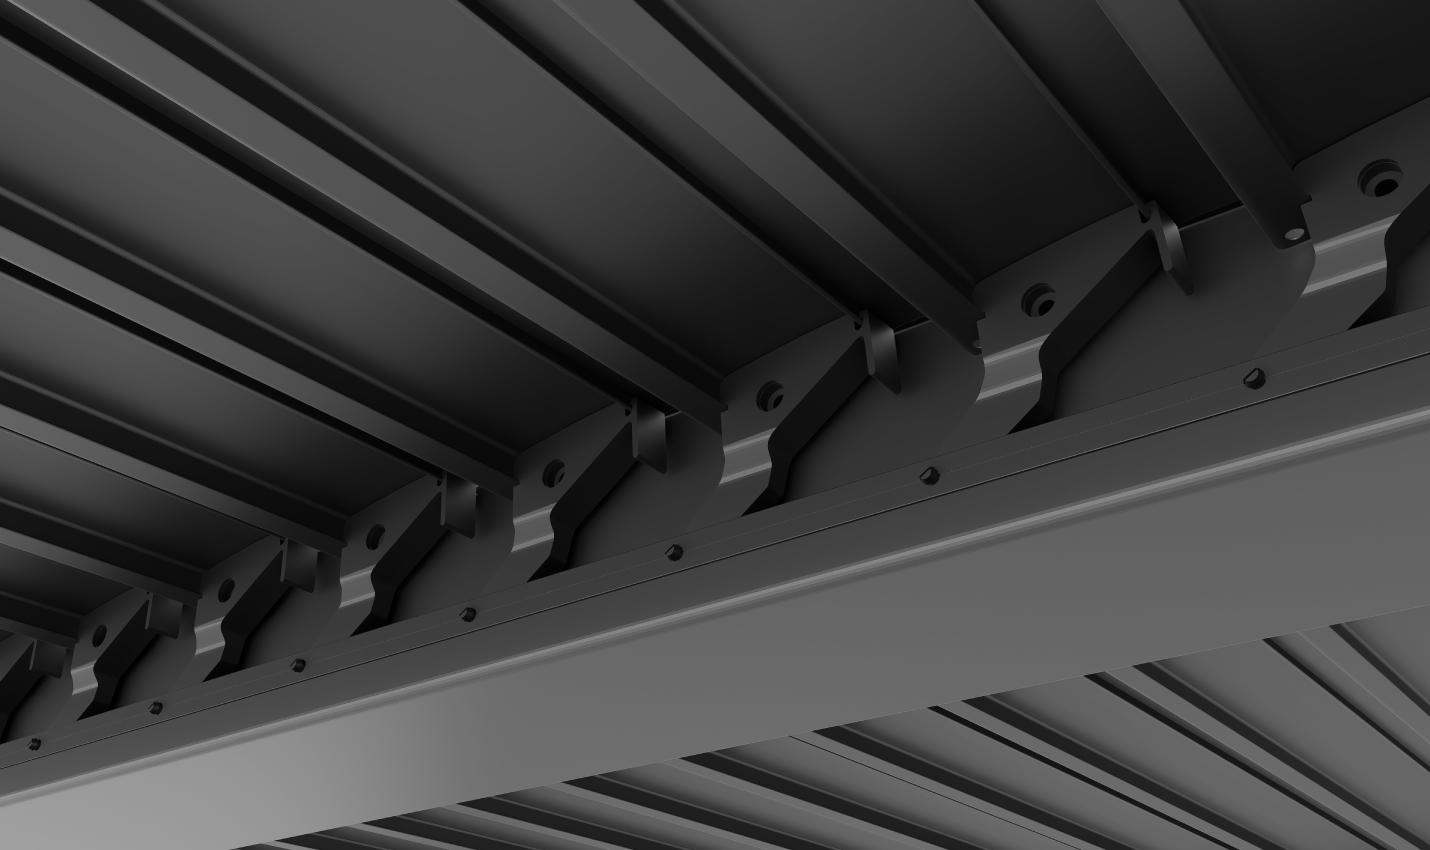
A continuación, instale el puestos. Son la columna vertebral de su pérgola, por lo que deben estar perfectamente verticales y seguros. La mayoría de los postes de aluminio son perfiles huecos extruidos con agujeros pretaladrados para las vigas. Fije cada poste a su base, utilizando un nivel para comprobar la verticalidad desde dos ángulos. Unos tirantes o cuerdas temporales pueden mantener firmes los postes hasta que se termine el armazón. La parte superior de los postes suele tener placas o ranuras para las vigas. Si tu pérgola incluye desagüe, conecta ahora las tuberías internas para garantizar un buen desagüe del tejado más adelante.
En montaje del marco es el núcleo de la construcción, con vigas principales y travesaños. Empieza conectando las vigas a los postes para formar el contorno de la pérgola. Muchos diseños utilizan pernos o conectores a presión, que simplifican las cosas. Al principio, apriete los pernos sin apretarlos demasiado, para poder ajustarlos antes de apretarlos definitivamente. A continuación, añade travesaños y vigas para crear el soporte del tejado. Sigue comprobando el nivel y la escuadra, midiendo las longitudes diagonales para asegurarte de que el armazón está en su sitio. Algunas pérgolas tienen canales de drenaje ocultos en las vigas, así que siga el manual para instalarlos correctamente para un flujo de agua eficaz.
Instalación del tejado varía según el tipo de pérgola. En los modelos de techo fijo, se colocan paneles de policarbonato o vidrio templado, sujetos con clips o tornillos. Las pérgolas de lamas ajustables requieren la instalación de lamas de aluminio y su mecanismo de control, que permite ajustar la luz solar con una manivela o un motor. Asegúrese de que las lamas se alinean en paralelo y se mueven con suavidad, y de que las juntas de estanqueidad se mantienen en su sitio cuando están cerradas. Para los sistemas motorizados, el cableado y los controles pueden requerir un electricista autorizado, a menos que usted tenga experiencia. La instalación correcta de las rejillas es clave para resistir a la intemperie y facilitar su uso.
Termine con aseguramiento y ajustes finales. Apriete todas las conexiones, utilizando una llave dinamométrica si el manual especifica valores para evitar un apriete excesivo o insuficiente. Confirme que los postes están firmemente anclados, añadiendo refuerzos si es necesario. Compruebe el buen funcionamiento de las piezas móviles, como las rejillas, y de los elementos motorizados. Instale molduras decorativas o remates finales para mejorar el aspecto y proteger los componentes. Este paso garantiza que la pérgola sea segura, funcional y esté lista para su uso.
El proceso refleja la naturaleza modular y fácil de usar de las pérgolas de aluminio. Dividirlo en etapas claras hace que incluso los modelos más complejos sean manejables. Algunos de los diseños más recientes incluyen piezas premontadas, conectores codificados por colores o instrucciones guiadas, lo que facilita aún más la instalación.
Diferentes tipos de pérgolas de aluminio y su instalación
No todas las pérgolas de aluminio son iguales. Las hay de varios estilos, cada una con sus propias necesidades de instalación y características adaptadas a diferentes preferencias. Conocer estas diferencias le ayudará a elegir una que se adapte a sus habilidades, presupuesto y jardín. A continuación le mostramos los principales tipos y lo que implica su instalación.
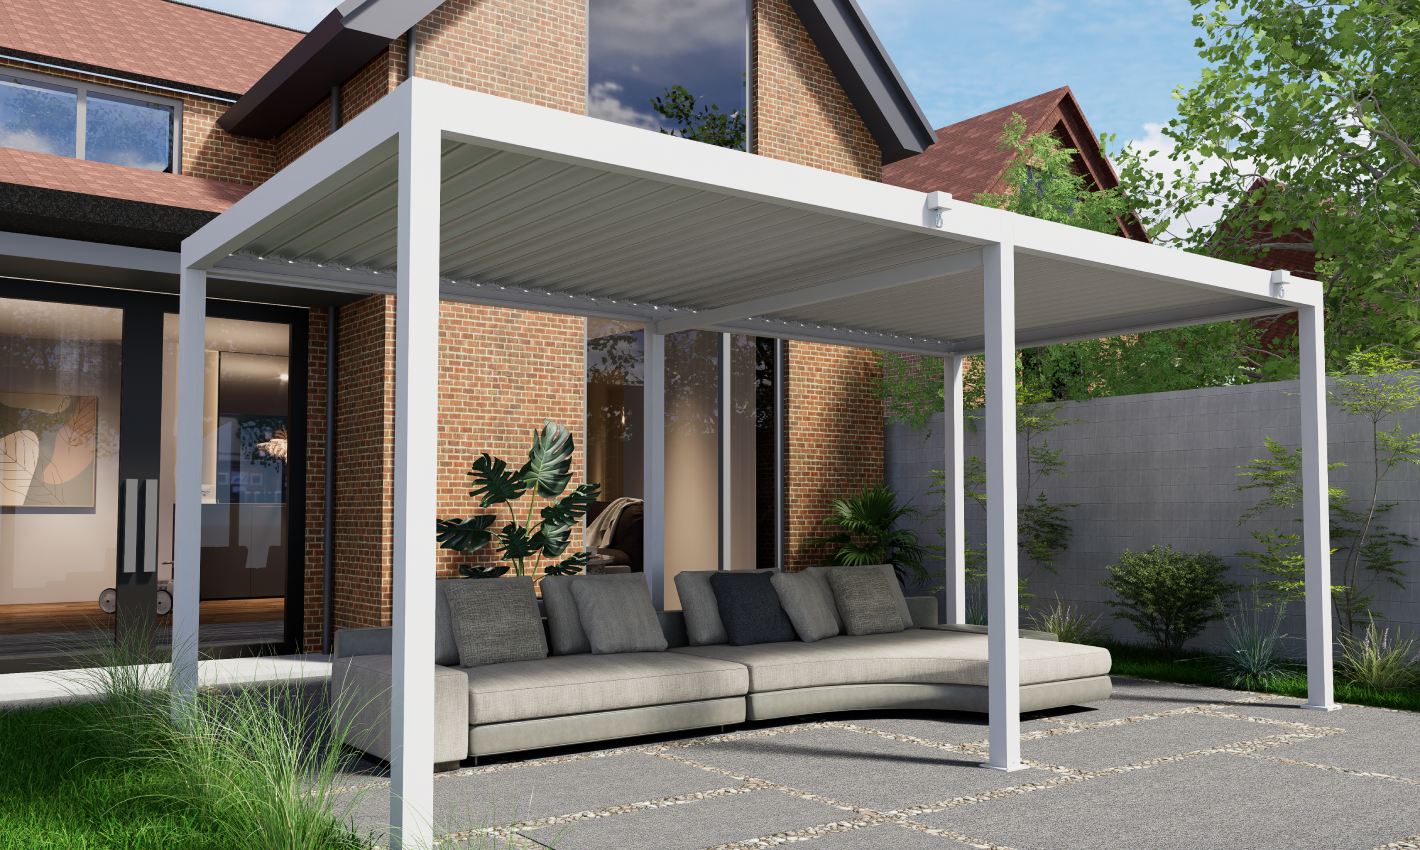
Marquesinas básicas de aluminio son los más sencillos y fáciles de instalar. Constan de cuatro postes y un tejado enrejado abierto, con un mínimo de piezas. La instalación consiste en colocar los postes, conectar las vigas y montar la rejilla del tejado, sin techos ni paredes complejas. Su peso ligero permite la instalación sobre adoquines o suelo reforzado, evitando a menudo las bases de hormigón. Son perfectos para los principiantes en el bricolaje que desean una sombra rápida, ya que ofrecen una protección limitada, principalmente contra el sol, pero no contra la lluvia o el viento. Algunos propietarios añaden plantas trepadoras para dar más sombra, aunque eso requiere un esfuerzo de jardinería.
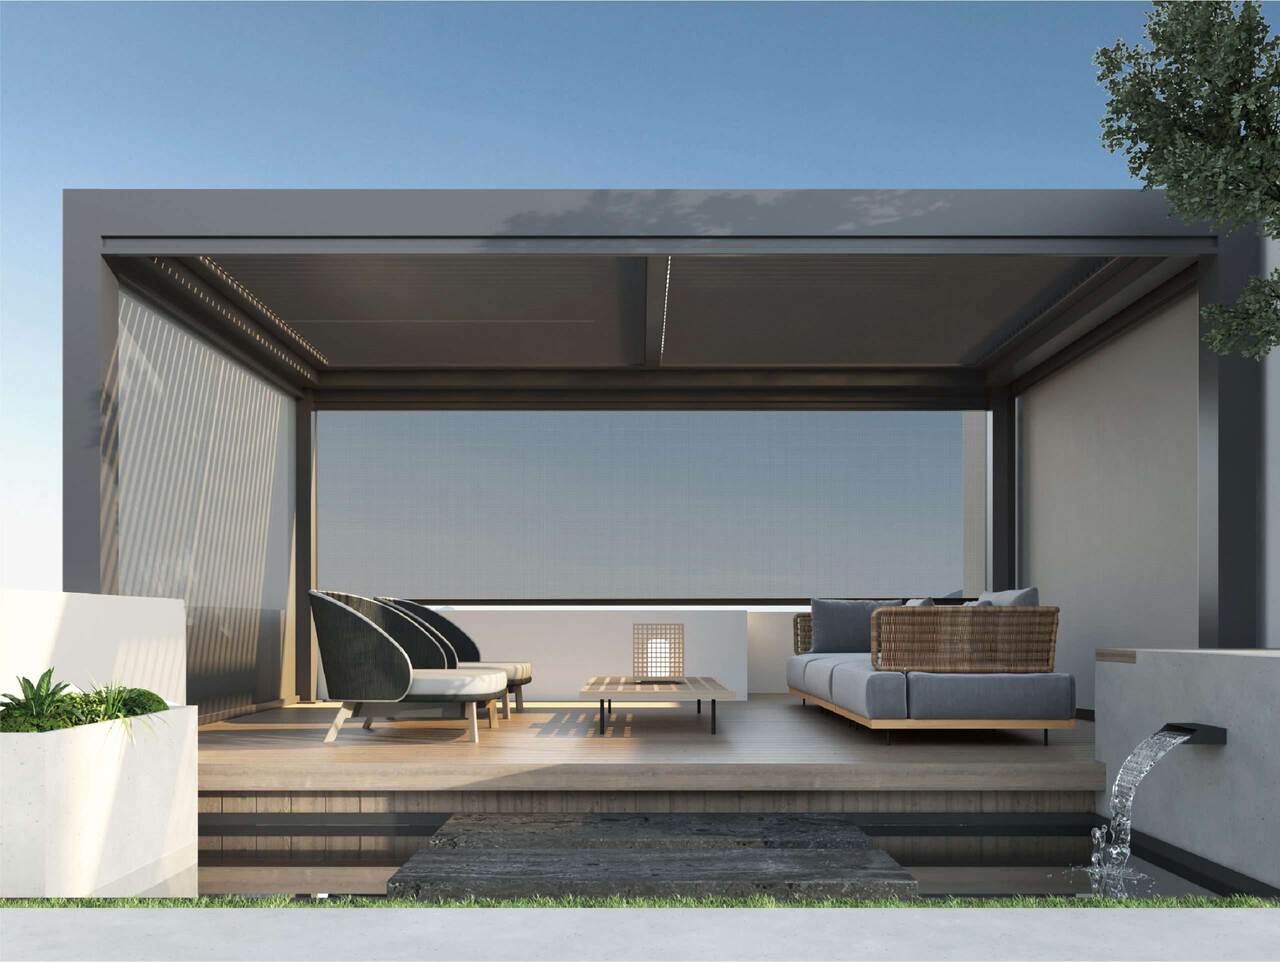
Pérgolas de lamas orientables son una opción popular de gama media. Se caracterizan por un techo de lamas que se puede inclinar manualmente o con un motor para controlar la luz y el aire. La instalación es más complicada debido al mecanismo de lamas, que requiere una alineación precisa para un movimiento suave y un cierre hermético cuando está cerrado. Muchas incluyen canales de drenaje que guían el agua para mantener seco el suelo. Las versiones motorizadas añaden complejidad al cableado, aunque los paneles solares están reduciendo la dependencia de la red eléctrica. Estas pérgolas equilibran la versatilidad con un esfuerzo de instalación moderado, permitiéndole alternar entre los modos abierto y protegido.
Pérgolas de aluminio totalmente cerradas son de alta gama y crean una habitación exterior casi interior. Combinan techos fijos de aluminio con paredes opcionales de cristal o pantalla, que ofrecen confort e intimidad. Su instalación rivaliza con los pequeños proyectos de construcción, que implican tejado, paredes, puertas, ventanas y, posiblemente, cableado para luces o ventiladores. Exigen cimientos sólidos, como losas de hormigón. Debido a su envergadura, los profesionales suelen encargarse de ellos, sobre todo si se añaden características. El resultado es un espacio que no se ve afectado por el clima durante todo el año, ideal para prolongar el tiempo al aire libre.
Pérgolas motorizadas inteligentes van más allá de la tecnología. Disponen de sensores que ajustan las rejillas en función del tiempo, como la sombra cuando el sol es intenso o el cierre en caso de lluvia. Algunas se sincronizan con sistemas domésticos inteligentes mediante aplicaciones o control por voz. La instalación requiere conocimientos estructurales, además de calibración de sensores, configuración de motores e integración en red. El suministro eléctrico, ya sea de bajo voltaje o estándar, añade complejidad y a menudo requiere un electricista. Aunque su instalación es costosa e intrincada, ofrecen una comodidad y un estilo moderno inigualables.
Más allá de éstas, las pérgolas varían según su forma (cuadrada, rectangular, hexagonal), tamaño o extras. Pérgolas autoportantes necesitan cuatro puestos, mientras que mural utilizan su casa como soporte, ahorrando espacio. Los modelos más pequeños (menos de 10×10 pies) son más rápidos de instalar, mientras que los grandes (16×26 pies o más) pueden requerir equipo y días de trabajo. Adaptar el tipo de pérgola a sus habilidades y necesidades garantiza un proyecto sin problemas y una satisfacción duradera.
Mantenimiento de la pérgola de aluminio para disfrutar de ella a largo plazo
Una vez instalada la pérgola, hay que cuidarla con regularidad para que tenga un aspecto estupendo y funcione bien. El aluminio requiere poco mantenimiento en comparación con la madera, pero aún así necesita atención para mantenerse en plena forma. A continuación te explicamos cómo mantenerla, desde la limpieza rutinaria hasta las revisiones estacionales, para maximizar su vida útil.
Limpieza rutinaria mantiene tu pérgola a punto. A diferencia de la madera, el aluminio no se pudre ni se enmohece, pero el polvo, el polen o los excrementos de pájaros pueden deslustrar su acabado. Límpiela trimestralmente con un cepillo suave, jabón suave de pH neutro y agua tibia. Concéntrate en las juntas y las vías de desagüe para evitar atascos. Evite lavar a alta presión cerca de las juntas para protegerlas, y aclare a fondo para evitar las manchas de agua. En el caso de rejillas motorizadas, corte la corriente antes de limpiarlas para proteger las piezas eléctricas.
Inspecciones periódicas detectar los problemas a tiempo. Compruébelo dos veces al año, idealmente en primavera y otoño. Compruebe que los tornillos no estén flojos, que los revestimientos no estén rayados, que las piezas móviles funcionen correctamente, que los desagües no estén obstruidos y que la estructura sea estable. El aluminio resiste el óxido, pero los pernos de acero en contacto con él pueden corroerse, así que inspeccione estos puntos. En los modelos motorizados, compruebe el cableado y los dispositivos de seguridad. Registra los problemas y soluciónalos rápidamente para evitar reparaciones mayores.
Retoques superficiales conservar el aspecto. Los recubrimientos en polvo son resistentes, pero los arañazos o desconchones producidos por los residuos pueden dejar al descubierto el aluminio. Limpie y lije los pequeños desperfectos, aplique imprimación metálica y utilice pintura de retoque a juego, a menudo disponible a través de los fabricantes. Las abolladuras profundas pueden requerir una reparación profesional o la sustitución de piezas. Solucionar los daños rápidamente protege el metal y mantiene su buen aspecto.
Mantenimiento del drenaje es vital. Muchas pérgolas incorporan canales o tubos de poste para gestionar el agua. Limpie las hojas o los residuos con regularidad, especialmente en otoño o primavera, utilizando una manguera para comprobar el caudal. En los modelos equipados con sensores, compruebe que funciona la detección de lluvia. En climas gélidos, evite la acumulación de hielo con medidas anticongelantes o cierres estacionales del desagüe.
Cuidado estacional se adapte a su clima. En zonas nevadas, retire la nieve espesa (la mayoría de las pérgolas soportan 15 cm de nieve seca), compruebe las juntas y cubra las piezas eléctricas si no se utilizan. En regiones ventosas y polvorientas, lubrique más a menudo las piezas móviles. Las casas costeras necesitan una limpieza frecuente para combatir el aire salado y pueden beneficiarse de revestimientos más gruesos. La primavera es un buen momento para evaluar los daños del invierno y prepararse para un uso intensivo.
Cuidado del sistema motorizado se aplica a las pérgolas inteligentes. Pruebe las funciones, compruebe las baterías de reserva, calibre los sensores y actualice el software cuando sea necesario. Deje los trabajos eléctricos complejos en manos de profesionales, especialmente durante los periodos de garantía, para evitar anular la cobertura. Las inspecciones profesionales anuales pueden evitar fallos en el sistema.
Con un plan de mantenimiento constante -que combine cuidados diarios, revisiones periódicas y la ayuda ocasional de un profesional- su pérgola puede permanecer impecable durante décadas. En comparación con el constante lijado, tintado o control de plagas de la madera, el mantenimiento del aluminio es muy sencillo. Esta facilidad, unida a una instalación sencilla, hace de las pérgolas de aluminio una opción inteligente para combinar estilo y funcionalidad en la vida moderna al aire libre.
Wbest ayudará con la instalación de la pérgola aftersell . póngase en contacto con con nosotros para más información .